

BitsyMiner is now available as an open source project on GitHub. See here.
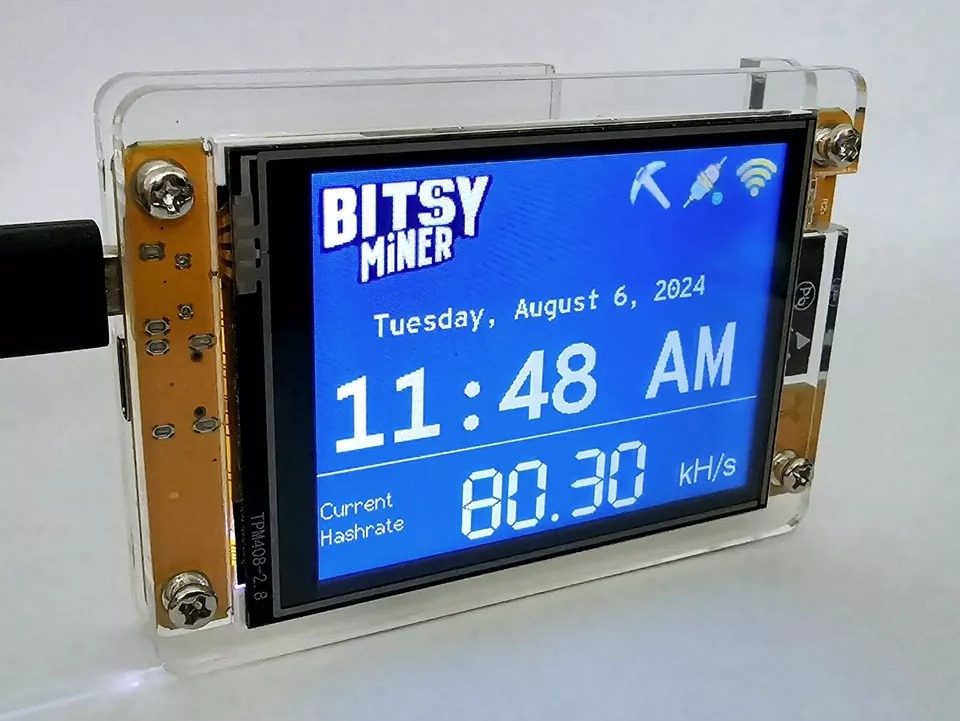
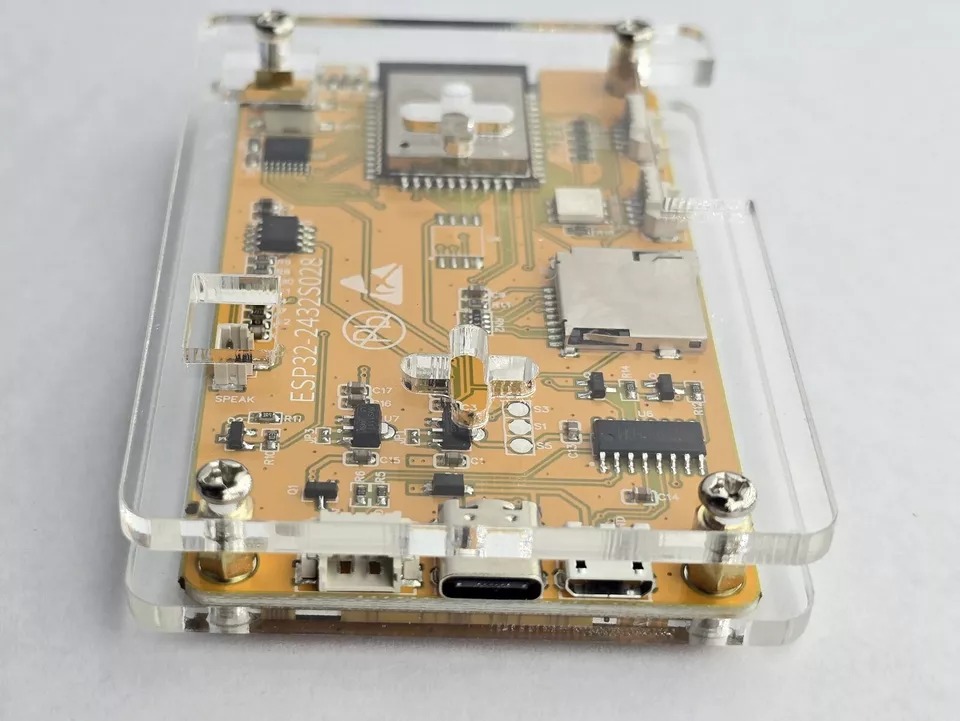
BitsyMiner is a Bitcoin lottery miner application designed to run on ESP32 microcontroller devices. BitsyMiner is an engaging and educational tool, perfect for anyone looking to explore and enjoy the world of Bitcoin mining.
Already have BitsyMiner and ready to get started? Make sure you have your Bitcoin wallet handy, and follow the instructions below.
Overview
To set up your BitsyMiner, follow these important steps: update the admin username and password, configure your mining settings, and set up your network.
Initially, the BitsyMiner will create its own network as an access point for easy setup. After you configure the network settings, it will connect to your home network as a client device.
Step 1
When you power on your device running BitsyMiner for the first time, the device will create its own network as an access point. You will will need to connect to the access point using your phone or computer. The screen will look like the one below.
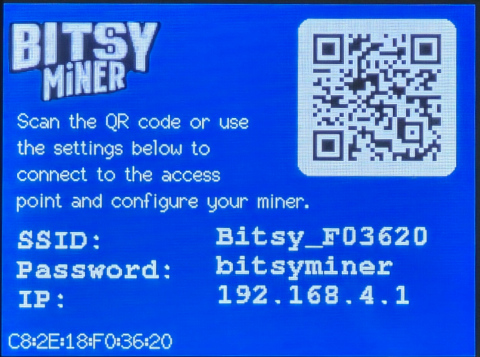
If you're using your phone, you can scan the QR Code from the device's screen, and it should automatically connect you to the the access point. Otherwise, you can connect to the device's WiFi manually using the SSID and password displayed.
Step 2
Once your computer or phone is connected to BitsyMiner's access point, open a web browser on your device and navigate to http://192.168.4.1.
Step 3
The device will guide you to the configuration screen where you must log in with the default username and password, "bitsy" and "miner" respectively.

Step 4
Before BitsyMiner can connect to your network, you must change the device's admin password. This is to help protect the integrity of your network. You may optionally choose a different username as well.
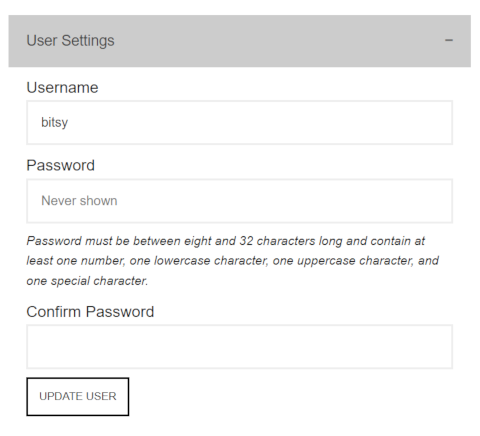
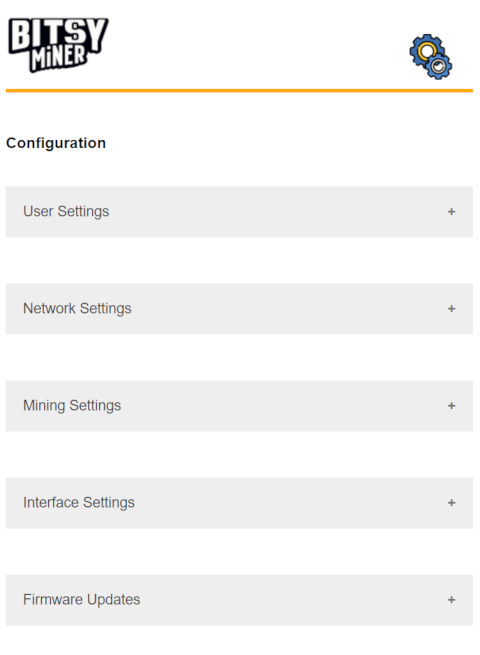
After changing the password, all of the device's settings become available to the user. The order of the settings below is not important, but keep in mind that you will need to reconnect to the device after connecting it to your network.
Mining Settings
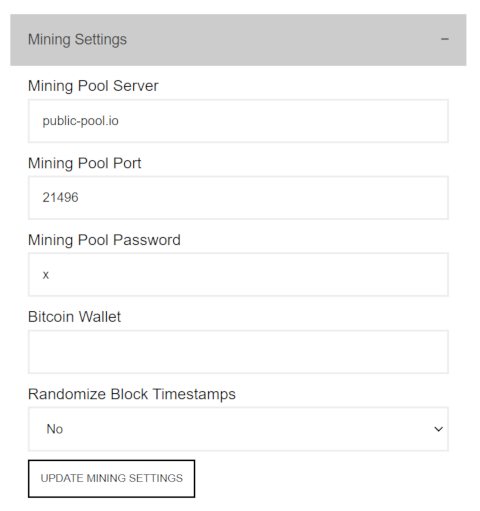
Enter your Bitcoin wallet address into the designated field and hit the "Update Mining Settings" button. If you already completed your network settings and are connected to your home network, mining will start immediately. Otherwise, the device will begin mining after you have completed the network setup.
These settings can be modified at any time, and you may choose to connect to a different pool. However, we have found that the default pool (https://web.public-pool.io) typically provides the best experience.
You can also check out https://pool.sethforprivacy.com, for example, which also supports low hashrate devices.
The "Randomize Block Timestamps" option will add a random number to the time stamp value in the block template received from the pool. This introduces just a bit more randomness to your attempts at finding a block.
Network Settings
During the initial setup, BitsyMiner will operate as a network access point, allowing you to connect directly to it. This is necessary to communicate with the device and configure it to join your home network. Once the network setup is complete, BitsyMiner will connect to your home network as a client, just like any other device (computer, tablet, phone, etc.).
In this section, you will specify how BitsyMiner connects to your home network:
If you are an advanced user and prefer to assign a static IP address:
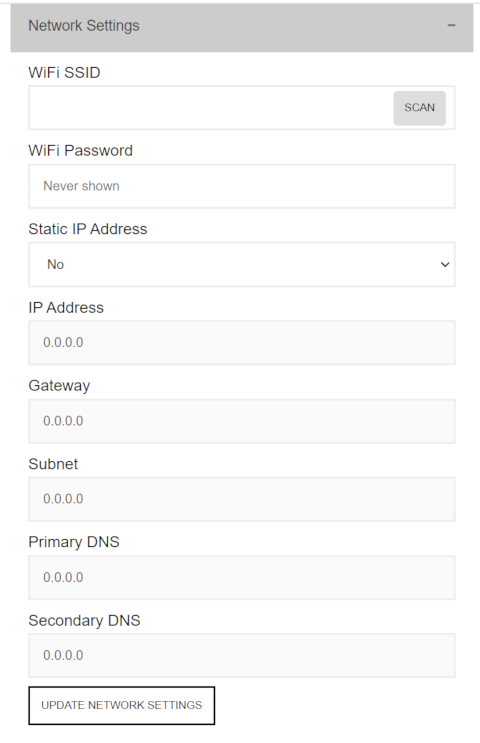
When you're ready, hit the "Update Network Settings" button. After confirming your choice, the following will occur:
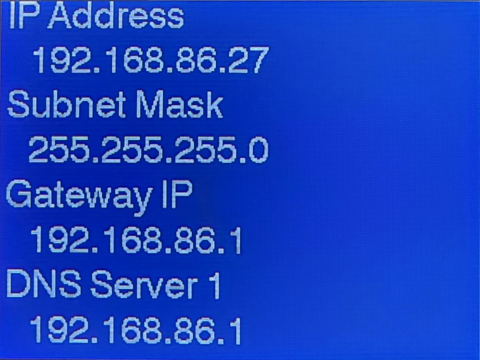
Very Important: When the device displays the mining screen, it is in client mode and will have a different IP address than it did in access point mode. To view this IP address, simply hold your finger on the screen for a moment to cycle to the next screen. Here, you will see all the relevant network information.
You can use the IP address shown on this screen to connect to your device via your browser.
Display Settings
Changes to the user display are optional, but you may want to change your screen colors, brightness, or rotation to better suit your environment. Changes take place immediately after hitting the "Update Interface Settings" button.
You can optionally turn on an inactivity timer that can modify the screen's brightness if the screen has not been touched for a given duration.
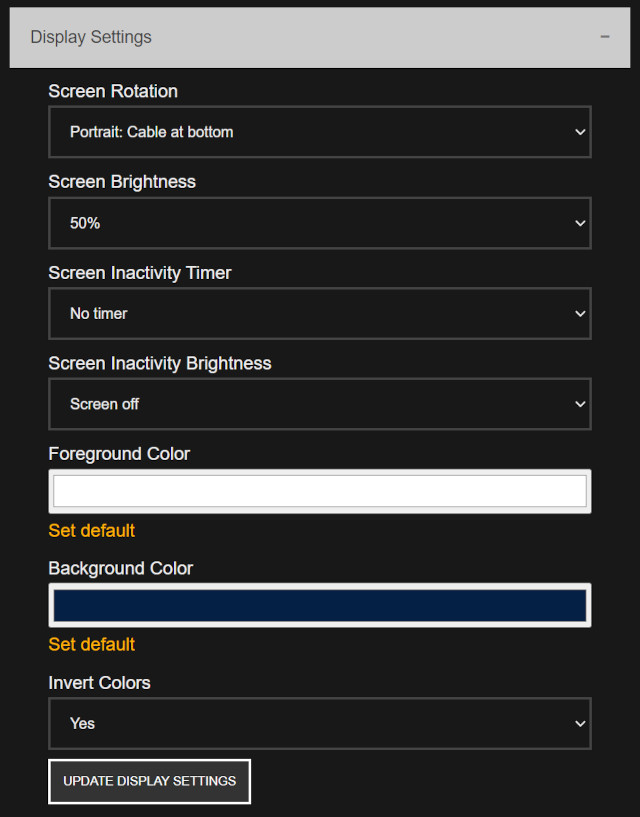
The BitsyMiner will function on boards that use the ILI9341 display driver. Some boards require color inversion and some don't. If the screen colors don't look right, choose the correct invert colors option for your board.
General Settings
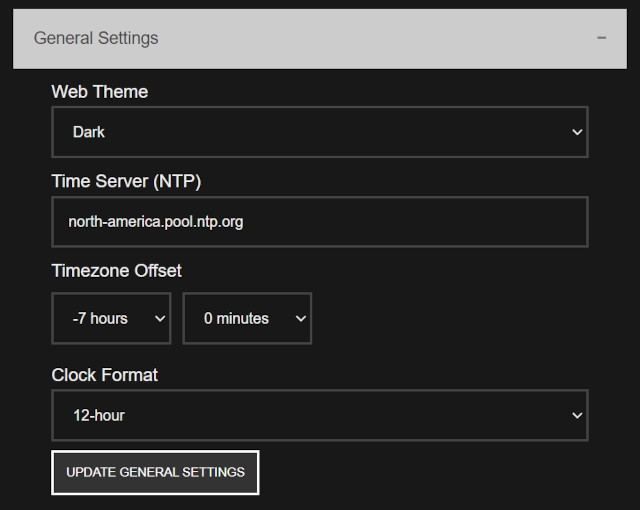
The web theme determines whether a standard or dark color palette is used.
The BitsyMiner will periodically retrieve the current time from an NTP (Network Time Protocol) server. You can change to a different NTP server should you choose or stick with the default.
Set the timezone offset to make sure that your current time is displayed correctly. You can also choose whether to display the clock in 12 or 24 hour format.
Advanced Settings
Enable Stratum Repeater - Enabling this experimental feature will open a stratum server on port 3333, allowing other miners on your network to connect to it. Messages from the BitsyMiner's main stratum connection will be relayed to the attached miners, and solutions from attached miners will be fed back through the primary connection.
There are a couple of potential benefits. First, it might allow you to easily switch a group of miners to a different pool or wallet without having to change settings in each one. Second, you might have a need to increase your hashrate in a single connection or a desire to do more work on the nonce.
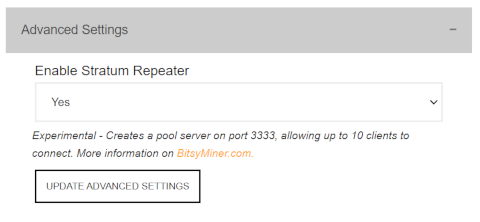
If you can't think of why you'd want to do this, you probably don't. Here are some things to keep in mind if you do:
Firmware Updates
We periodically release firmware updates to add functionality or fix bugs. Click the "Check for Updates" button to see if a new firmware version is available. Note: This feature will not work while the device is in access point mode.

Web Interface
The web interface is always available, whether in access point or mining mode. It serves two purposes. First, you can access the device's settings and make modifications on-the-fly. This might include switching to a different mining pool or changing the colors on your device's display. Second, the web interface will show mining statistics.
You can access the web interface by using your device's IP address and navigating to it in your browser as follows:
http://<Your IP Address>
If you are unsure of your IP address, gently press your device's screen and hold until the screen changes to display your network settings. To switch back to the mining screen, repeat this process.
Web Interface:
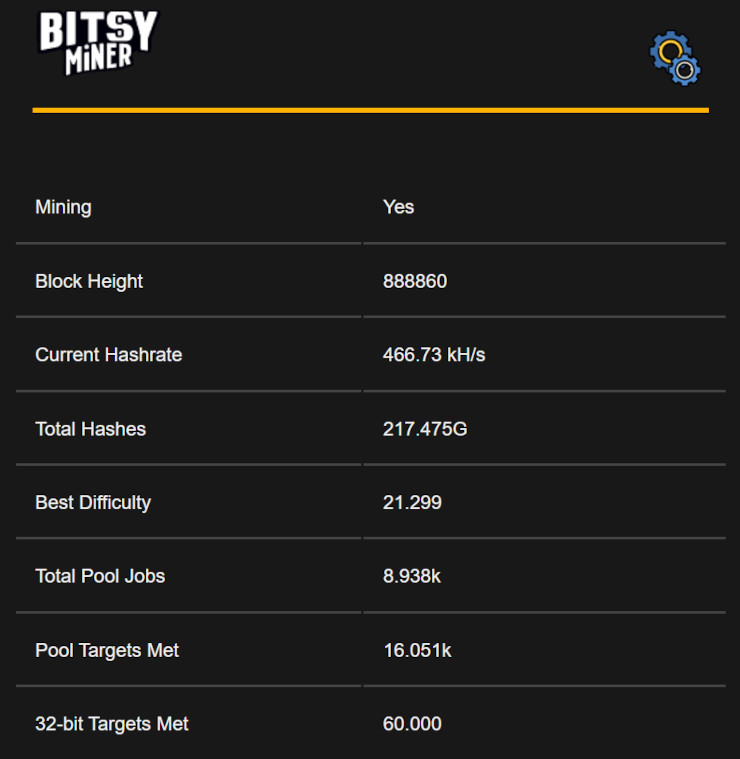
When displaying mining statistics, the screen will automatically refresh every 10 seconds.
To access the settings from the main screen, click on the gears icon in the upper right-hand corner.
Device Display
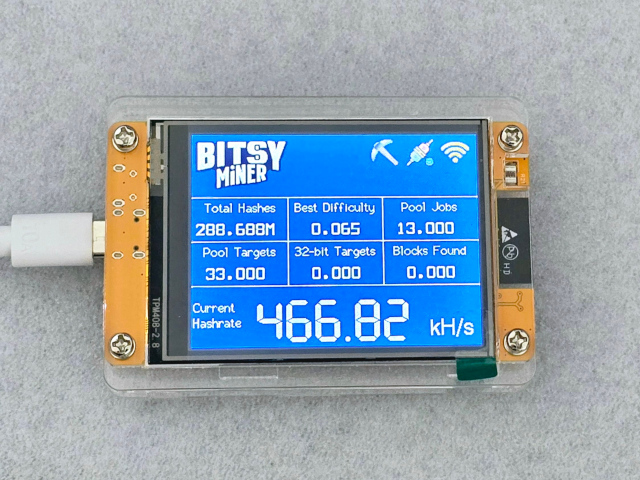
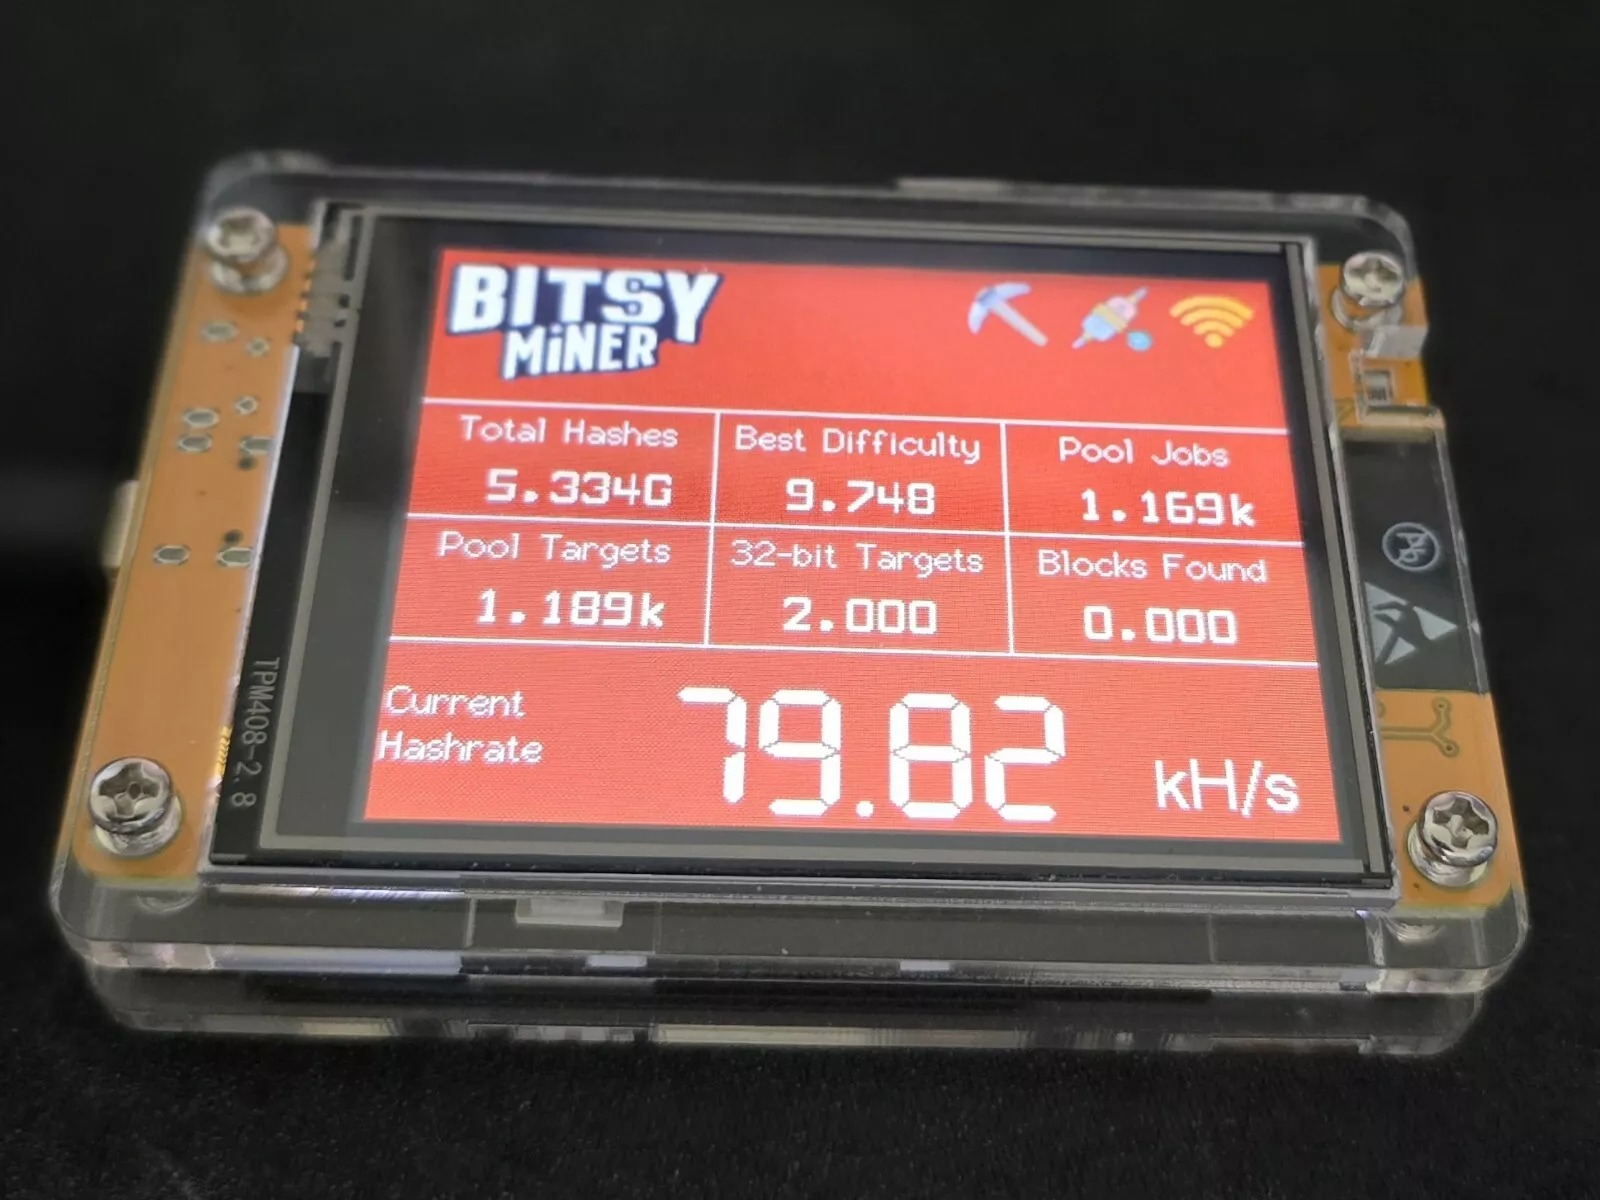
The device's display refreshes every second and shows the most up-to-date statistics regarding your mining session.
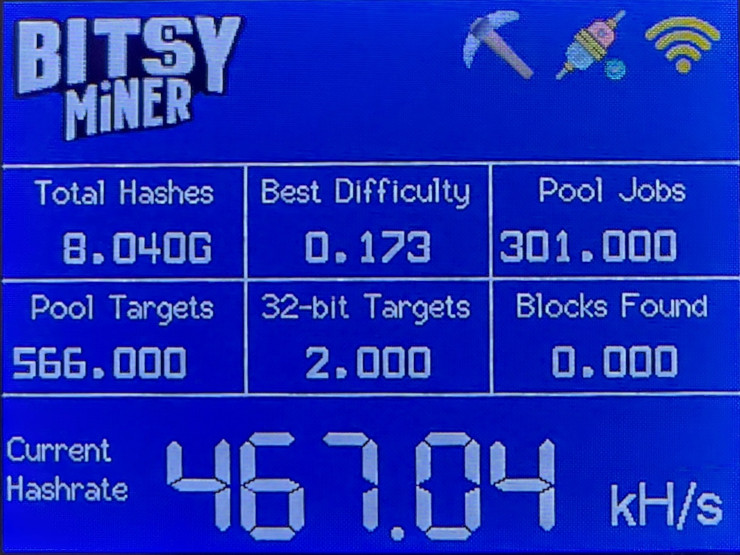
Mining Statistics:
Screen Icons:
 |
Your device is connected to a WiFi access point. |
 |
Your device is NOT connected to a WiFi access point. |
 |
Your device is connected to a mining pool. |
 |
Your device is NOT connected to a mining pool. |
 |
Your device is actively mining a block. |
Device Buttons
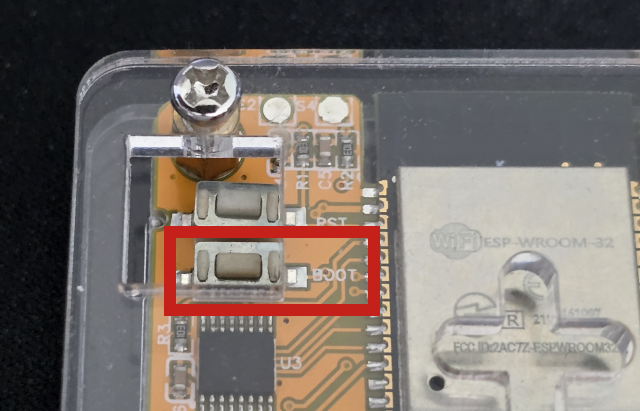
There are two buttons on the device, a reset button and "boot" button. The reset button, as one might expect, will reset the device. Should it become necessary to reboot the device, it is likely easier to simply unplug it for a moment and plug it back in.
The boot button, on the other hand, serves two purposes.
Have questions or comments?
No support is offered for the open source binaries or source code. They are provided as-is.
These notes apply only to the purchased version of BitsyMiner, not the open source project.
v1.5.13
v1.5.12
v1.5.11
v1.5.10
v1.5.9
v1.5.8
v1.5.7
v1.5.3 - v.1.5.6
v1.5.2
v1.5.1
v1.5.0
v1.4.1
v1.4.0
v1.3.3
v1.3.2
v1.3.1
v1.3.0
v1.2.0
v1.1.6
v1.1.5
v1.1.4
v1.1.3
v1.1.2
v1.1.1
v1.1.0
v1.0.0
BitsyMiner makes use of the following open source components:
Configuration icons created by Freepik - Flaticon
Offline icons created by Pixel perfect - Flaticon
Pickaxe icons created by smashingstocks - Flaticon
No-internet icons created by Paul J. - Flaticon
Connected icons created by Paul J. - Flaticon
Log icons created by Laisa Islam Ani - Flaticon